
The Dictate function in Word allows you to use speech-to-text functions to create content using your microphone. Learning how to dictate in Word will provide a quick and easy way to put your thoughts into words and capture ideas efficiently. It is great if I am wanting to freely create content without the need to type it out.
Dictation is also a great tool for use in the classroom to allow students to get their thoughts out and into words which can then be built into full sentences.
Dictation allows you to incorporate punctuation by saying the type of punctuation you want to use. This includes phrases such as “full stop”, “newline”, “delete” and much more. You can even include some formatting options such as “bold”, “italics”, “strikethrough”, “align” and more. Want to start a bullet or numbered list? No problems, use terms such as “start list” or “start numbered list” and you are set to go.
Create a document using the dictate feature
Beginning to use the dictate function in Word is very simple. The feature is available via the Home tab and will immediately begin listening for you to commence speaking so that dictation begins.
- Open Microsoft Word
- Create a new blank document if needed
- From the Home, tab click the Dictate button

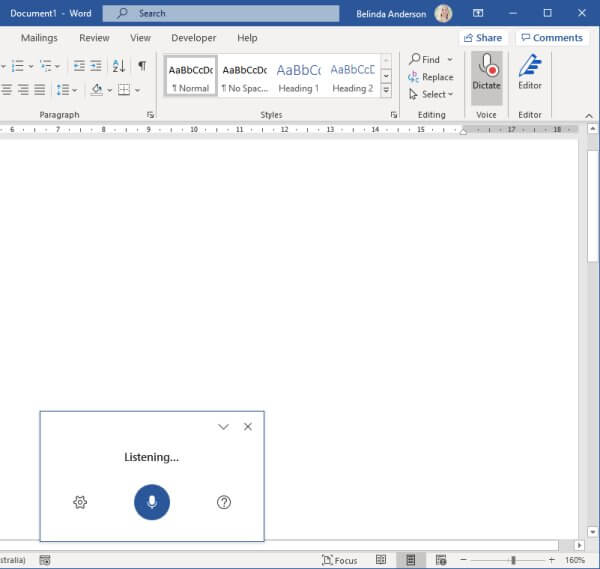
- The dictate feature is now active and listening for you to begin speaking
- Begin talking so that the dictation will commence. You will see your speech converted to text in the document.

Pause Dictation
As you are speaking, you can easily pause the dictation function if you need to think about what you want to say next, or maybe you need to speak to someone or answer a phone call.
- From the dictation window, click the microphone icon
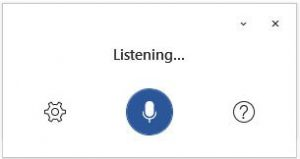
- You will see the status change from Listening to Tap the microphone to resume
- If you wish to begin dictation again, click the microphone icon again.
Another great option instead of having to use your mouse and click the microphone is to say “pause dictation“. You cannot start dictation back up using voice as it is not listening to you when not in use, but you can pause the dictation.
Editing text whilst dictating
Although dictation is awesome, it can sometimes make a mistake with the voice to text recognition, or maybe you say a sentence in a particular way and then decide it doesn’t sound right. You can activately edit the text as you dictate using a few easy commands.
- Click the microphone to begin dictation.
- Say a sentence but deliberately put in an incorrect word.
- Say “delete” after you say the incorrect word.
- Word will delete the last word.
- Again say a sentence with a dozen or so words.
- Now say “delete last 5 words“.
- Word will delete the last 5 words you said.
- Have a bit of a play with some of the editing options below.
| undo | delete | delete that * | delete last {# words} |
| insert space | backspace | backspace {1-100} |
Using Punctuation
The dictation feature allows you to include punctuation by simply saying which type of punctuation you want to be included. Phrases such as “full stop”, “comma”, “newline” etc will all be recognised by the dictation and included in your document.
- Click the microphone to begin dictation
- Say a sentence and say “full stop” at the end of the sentence.
- Dictation will automatically add the full stop for you.
- Repeat the process and use “comma” as your next option.
- How about adding a question mark at the end of a question, say “question mark“.
- Have a play with some of the punctuation options below.
| Phrase | Response | Phrase | Response |
| full stop | . | comma | , |
| question mark | ? | exclamation mark | ! |
| new line | new line | apostrophe | ‘ |
| colon | : | semicolon | ; |
| open quotes / close quotes | ” “ | hyphen | – |
| ellipsis | … | open/close parentheses | ( ) |
Include Formatting
The dictation function lets you include formatting as you speak. No need to go back and add in bold formatting or create a bullet or numbered list. You can do this as you speak and save time later.
- Click the microphone to begin dictation
- Say the following sentence “All participants should arrive by 9 am “, then say “bold participants“.
- The word “participants” should now be made bold.
- Let’s try italics, begin dictation and say “Using dictation is fun.”, then say “italics dictation“.
- The word “dictation” should now be in italics font.
| bold | italics | underline | strikethrough |
| superscript | subscript | indent | decrease indent |
| clear all formatting | align (left, centre, right) | start list | start numbered list |
Dictation Settings
There are some options you can edit within the Dictation settings to adjust how dictation works. This includes punctuation, a profanity filter, and the ability to change the language you are speaking.
- Make sure dictation is active
- From the dictation window, click the Settings icon

- You can choose to enable Auto punctuation, turn on or off the Profanity filter or choose a different spoken language from the options available.
I hope this has helped you to explore the world of dictation in Microsoft Word. You can actually find the dictate function in many of the Microsoft Office programs including Microsoft Outlook and PowerPoint.
Reference: https://www.thetraininglady.com/dictate-document-word/